Supplies
- FloraCraft® CraftFōM®:
- 5” Ball - White
- Pearl Head Pins
- Acrylic Paint - Pink
- Triple Thick Gloss Glaze (Optional)
- 5/8” Ribbon - Coordinating Color
- Sheer Glittered Ribbon
- Chenille Stem
Tools
- Low-Temp Glue Gun
- Scissors
- Flat Paint Brush
- Paint Spatula or Putty Knife
- Sponge
- Wood Skewer
- FloraCraft® Smooth Finish ™
Instructions
- Completely coat the ball with Smooth Finish™. Smooth Finish™ can be applied to foam in a couple of different ways; with a spatula or a flat paintbrush. Be sure to mix the material before using it. When using a spatula, apply a small amount of the Smooth Finish™ to the foam and spread it out evenly in all directions, working it into the cells of the foam. If using a paintbrush, load material onto the brush and spread it onto the foam, smoothing out the lumps as you go.
- For a super smooth finish, you can wet sand or dry sand the Smooth Finish™ once applied. To wet sand, allow the material to dry partially. Dampen a sponge and very lightly smooth out any ridges. If the material is being removed while wiping with the sponge, let it dry a little more before wet sanding. To dry sand, let the material dry completely, then sand smooth with fine sandpaper. If the base coat is very rough, you can wet sand the deeper ridges, let them dry completely, then dry sand to the desired finish.
- Insert the skewer into the ball to use as a handle to paint the ball. Once the Smooth Finish™ is completely dry, paint the ball with acrylic paint. While the paint is still wet, sprinkle with fine glitter. The paint will secure the glitter in place as it dries. (Optional) Apply an even coat of gloss glaze to the painted ball to finish and let dry.
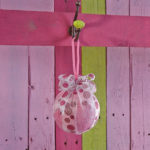
- Embellish the ornament with a ribbon tied into a bow at the top of the ball—glue to secure it.
- Loop a chenille stem and insert it into the top of the ball for the hanger. Use a pin and low-temp glue to secure.




 Subscribe


