Supplies
- FloraCraft® Make It: Fun® Foam: Eggs, 2-5/16″ x 3-1/16″, (2) 1-7/8″ x 2-1/2″
- FloraCraft® Make It: Fun® Foam: (10) Balls, 1-1/2″
- Paper Straw (at least 8″ long): Any Color
- (24) Cotton Swabs
- White Tacky Glue
Tools
- Ruler
- Pencil
- Paper Plate
- Paper Towel
- (2) Plastic Cups
- Wire Cutters
- Paper Cutter
- Low-Temp Glue Gun
- Computer and Printer
- Copy Paper
Instructions
Before working with the child
- Open the packages of foam and remove: One large egg, two small eggs, and ten foam balls.
- For the fingers and toes (phalanges) use a wire cutter to cut off and save the two cotton ends (plus 3/8” of the stick for insertion into foam) from each of ten cotton swabs. Put those into one plastic cup. Save two of the “sticks” and discard the rest. For the body’s bones, use the wire cutter to cut off and discard the 3/8″ tips from fourteen cotton swabs, leaving just a little of the cotton in order to get as much length as possible. Put those into the other plastic cup, along with the two short sticks that were saved from the fingers/toes.
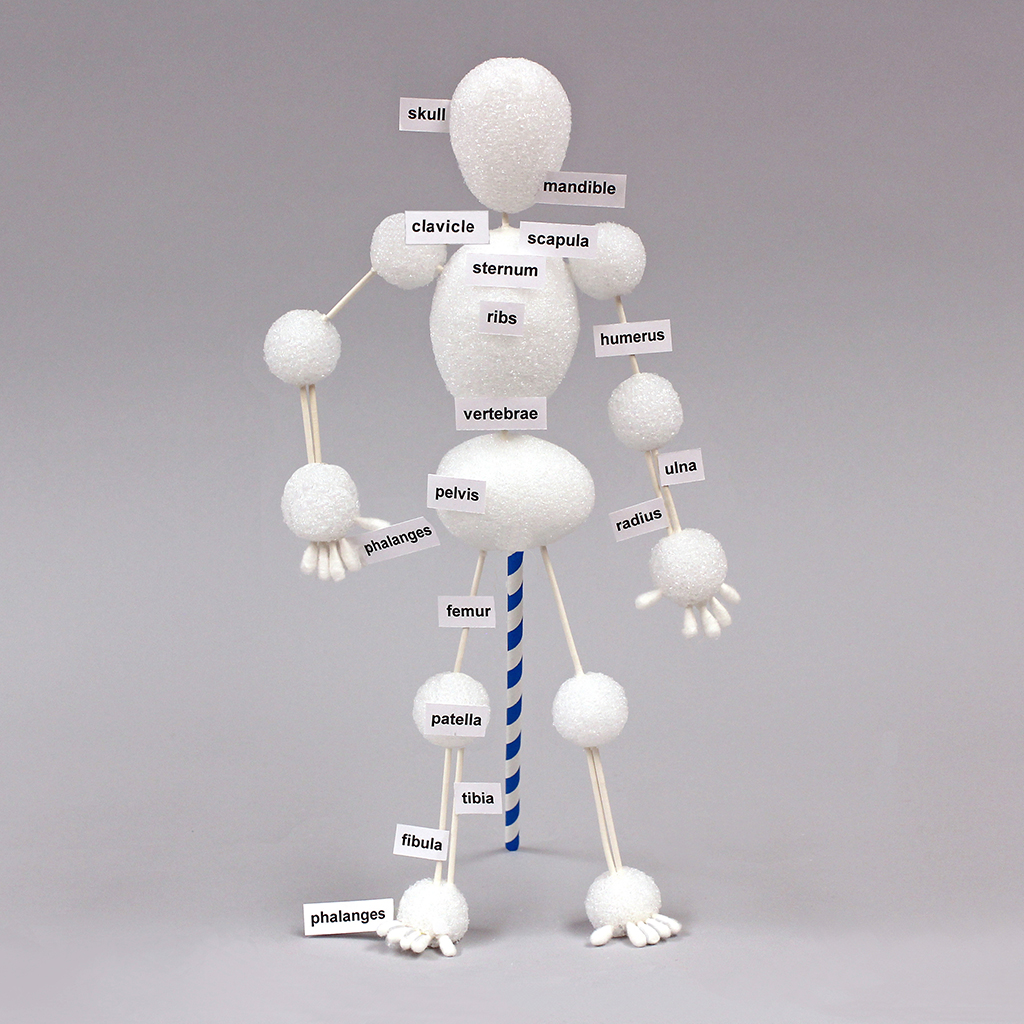
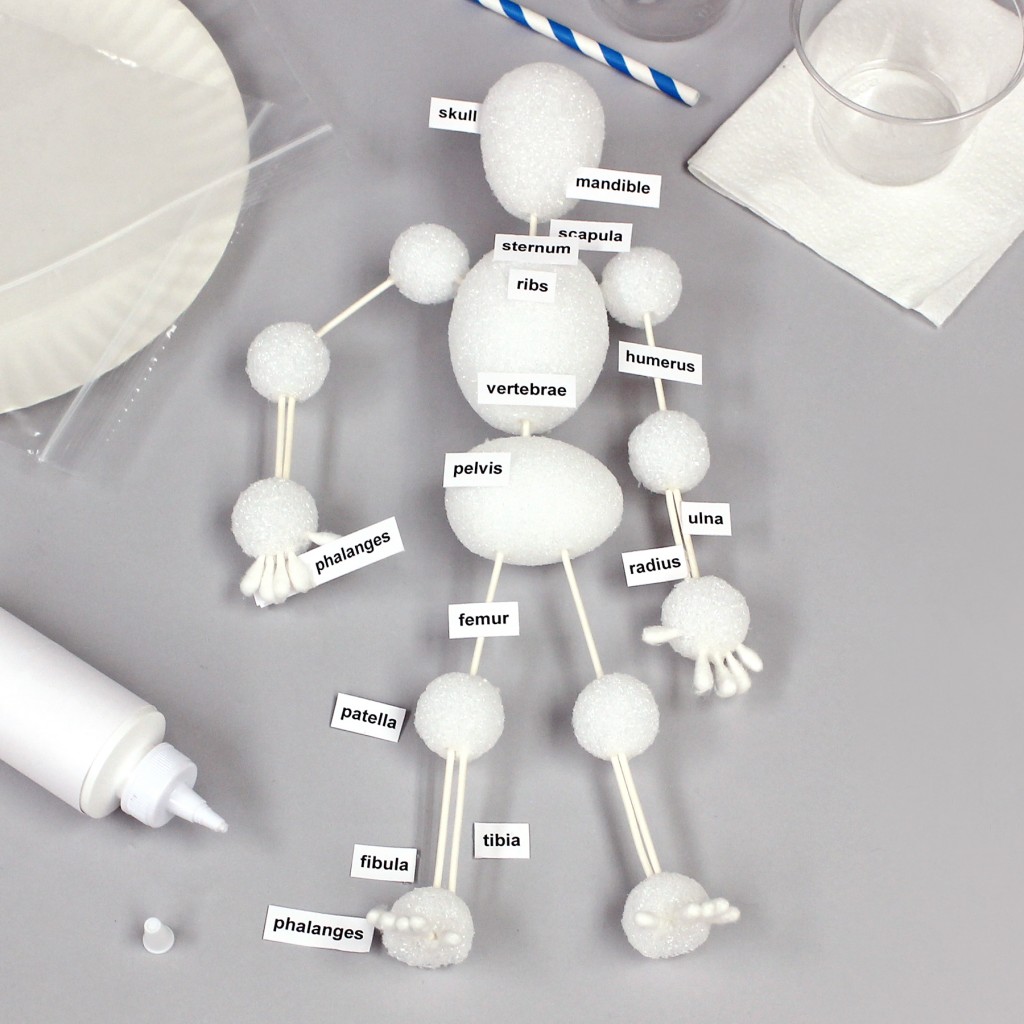
- Research online the bones in the body. Decide how in depth you want to go. Print off the diagram you want to have the child use for placing the names. Then, type the names from the diagram you’ve chosen. The photo model lists 17 bones: Skull, mandible, clavicle, scapula, sternum, ribs, vertebrae, pelvis, humerus, ulna, radius, phalanges, femur, patella, tibia, fibula and phalanges.
- Use a paper cutter to cut apart the words in approx. 1/2″ wide strips.
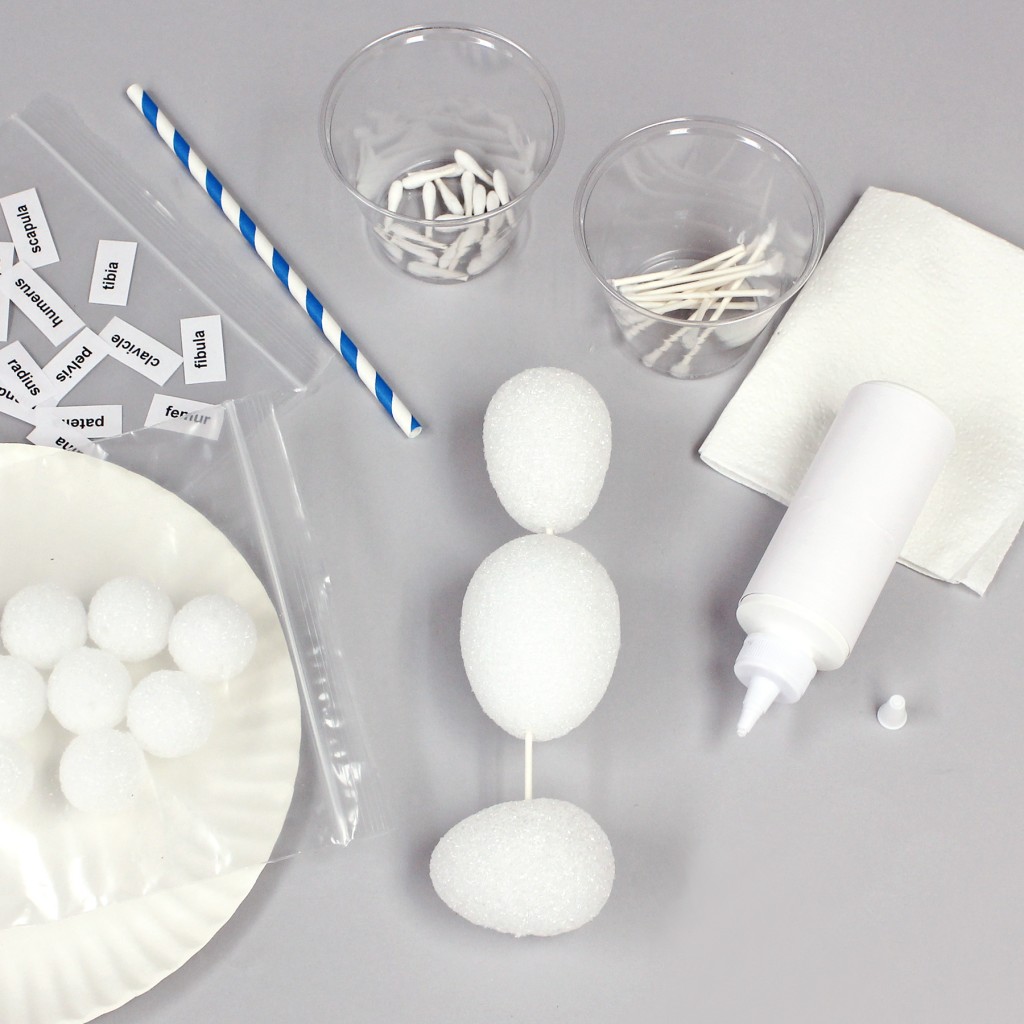
- Organize the materials: Foam eggs and balls, labels, plastic cup of cotton swab fingers/toes, plastic cup of cotton swab (stick) bones, straw, paper plate, paper towel, and tacky glue.
Do this part with the child
- Show the child the photo of Skelly and explain that this is a fun way to learn about the bones in our bodies, but that the parts are not to scale and the shapes are very general. (For example, our ribs do not look exactly like upside down foam eggs.)
- Show that there are two short cotton swab “sticks” that they should wait to use until they do the shoulders.
- For now, have them use two full-length cotton swab sticks to connect the three eggs, pointing out the position of each egg (skull – small end of small egg down; chest – small end of large egg down; hips – another small egg sideways). Explain that it’s important to insert the sticks carefully. Then have them remove one connection at a time, squeeze dots of glue on both ends and reinsert. Point out that the three eggs are the only foam pieces that are pushed close together.
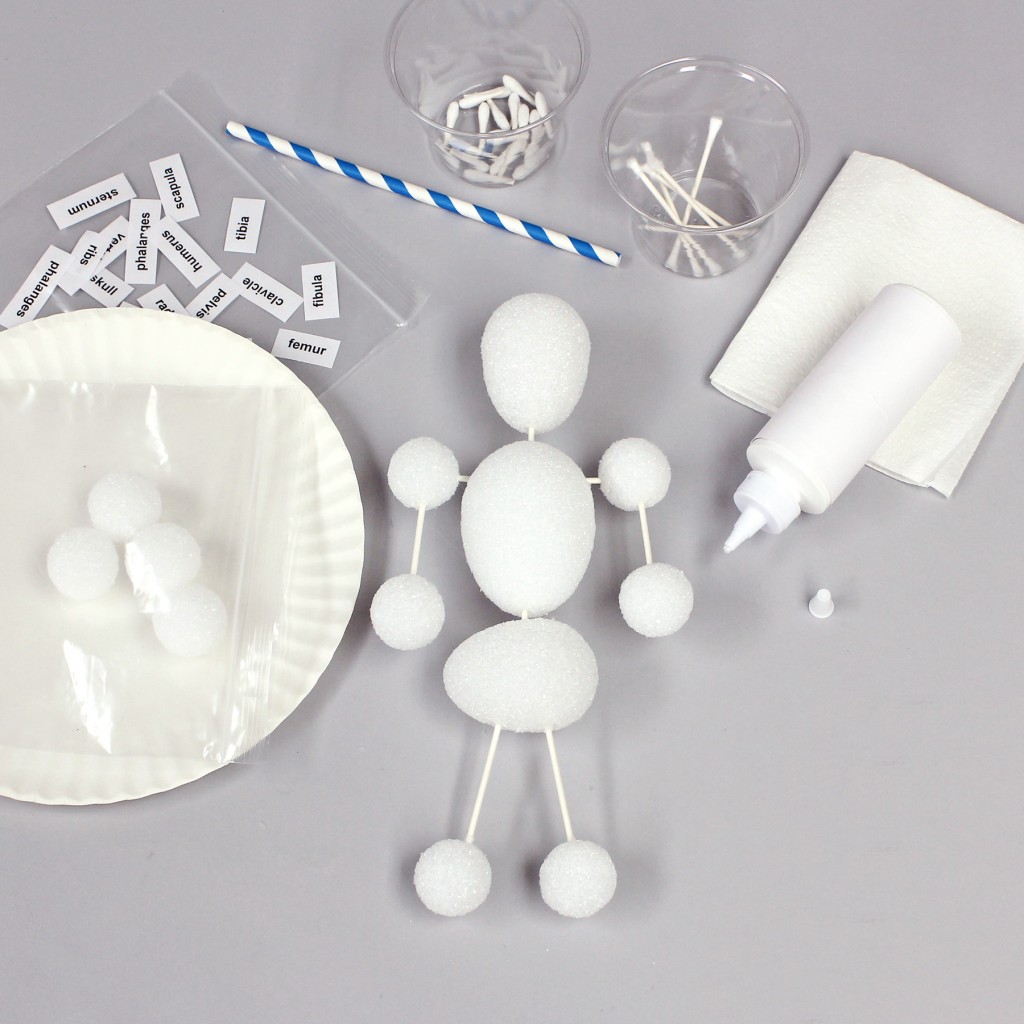
- For the shoulders, demonstrate and insert the two short sticks into the top sides of the egg, trying to miss the neck stick inside. (Note: Because of the neck stick, this is a little tricky but the other connections are easier. Have your glue gun ready if needed.)
- Have the child attach a foam ball to the end of each short stick. Add two more sticks to the bottom of the foam balls for the top of the arm. (Push in the sticks quite far so that the arms don’t get too long.) Attach the foam balls for the elbows.
- For legs, ask the child to insert sticks into the bottom of the horizontal egg, about 1″ apart, slightly angled out. (Don’t push in the sticks very far, so that the legs can be longer than the arms.) Attach the foam balls for the knees.
- Remove each connection, dot with glue and reinsert.
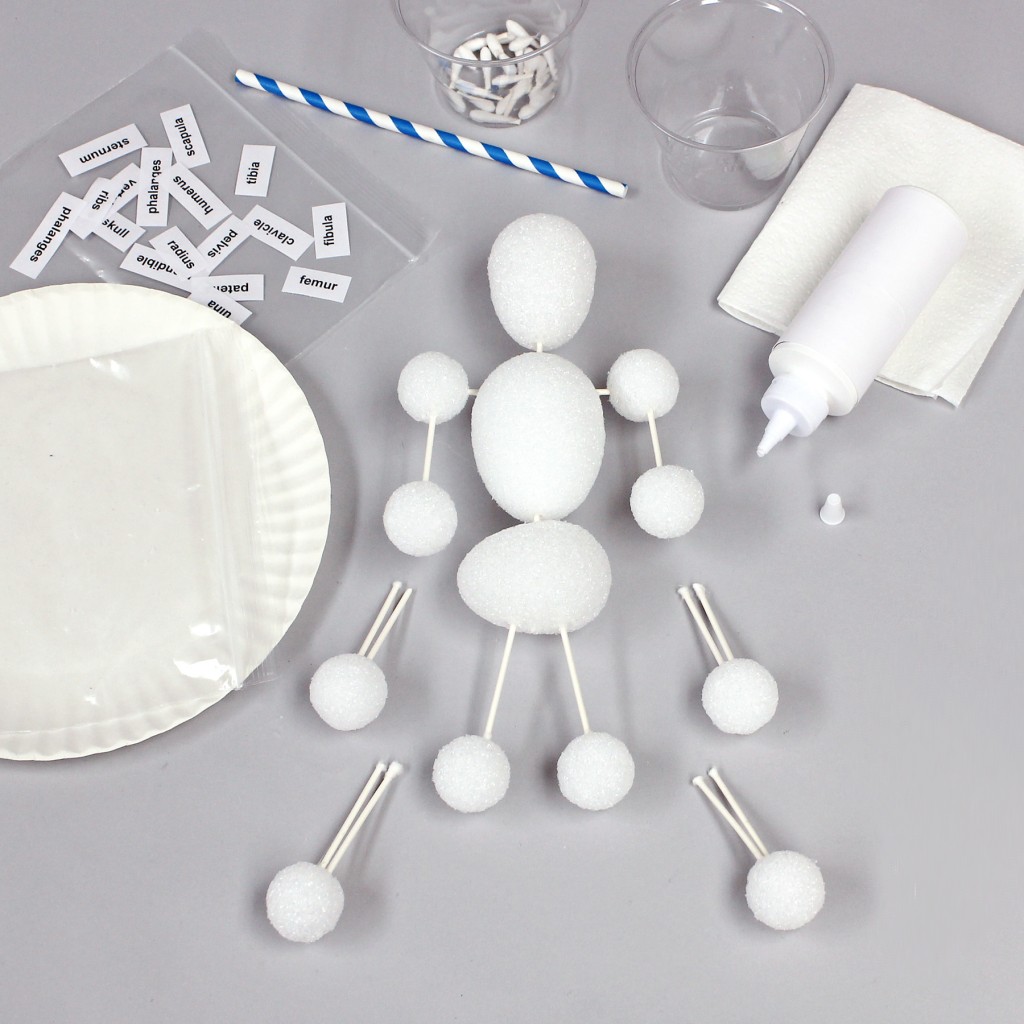
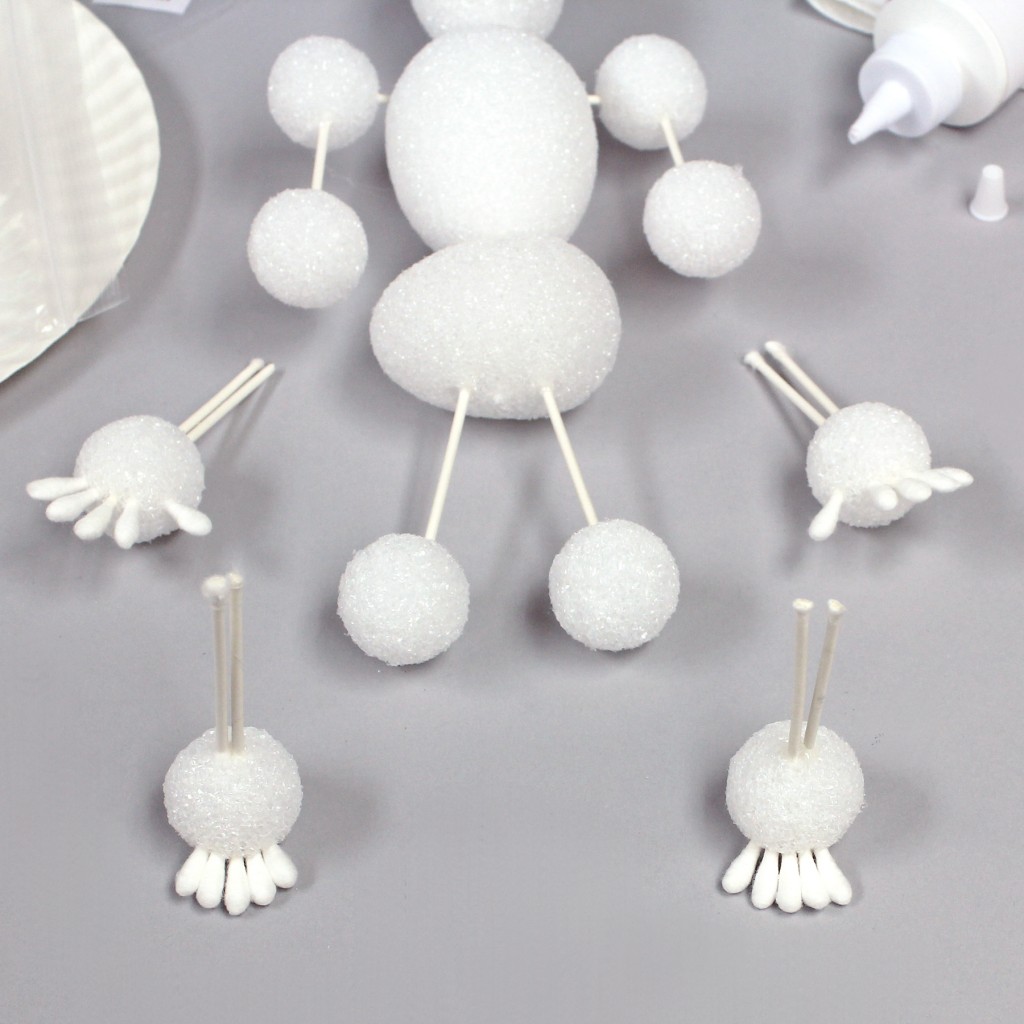
- Point out that the bottoms of each of the arms and legs have two bones, so they should insert two sticks, side-by-side into the foam balls for the hands and feet. But have them wait to attach them to the body. Glue to hold.
- Demonstrate and have them insert a cotton swab thumb (to the inside) and four fingers on the bottom of each hand. For the feet, have them stand up the leg units and insert five toes to the front of each. Unless there’s a loose one, these shouldn’t have to be glued.
- Have the child insert the bottoms of the arms and legs into the bottoms of the elbow and knee foam balls. (Remind them to carefully push the arms in farther than they do the legs.) Glue to hold.
- Give the child the reference printout to read the names of the bones. Demonstrate how to find the position of the bones on their skeleton and apply one dot of glue to the contact area to hold the label in place. Show examples of contact areas that are just on one end of the label or in the middle of it.
- Explain that this is why they should not apply glue all over the back. Most labels stick out beyond the edge of where glue would be needed.
- Point out that the photo of Skelly has all the arm bone labels on one side and all the leg bone labels on the other, but that the names of the bones are the same for both arms and for both legs. Ask the child to make the labels as horizontally straight as they can.
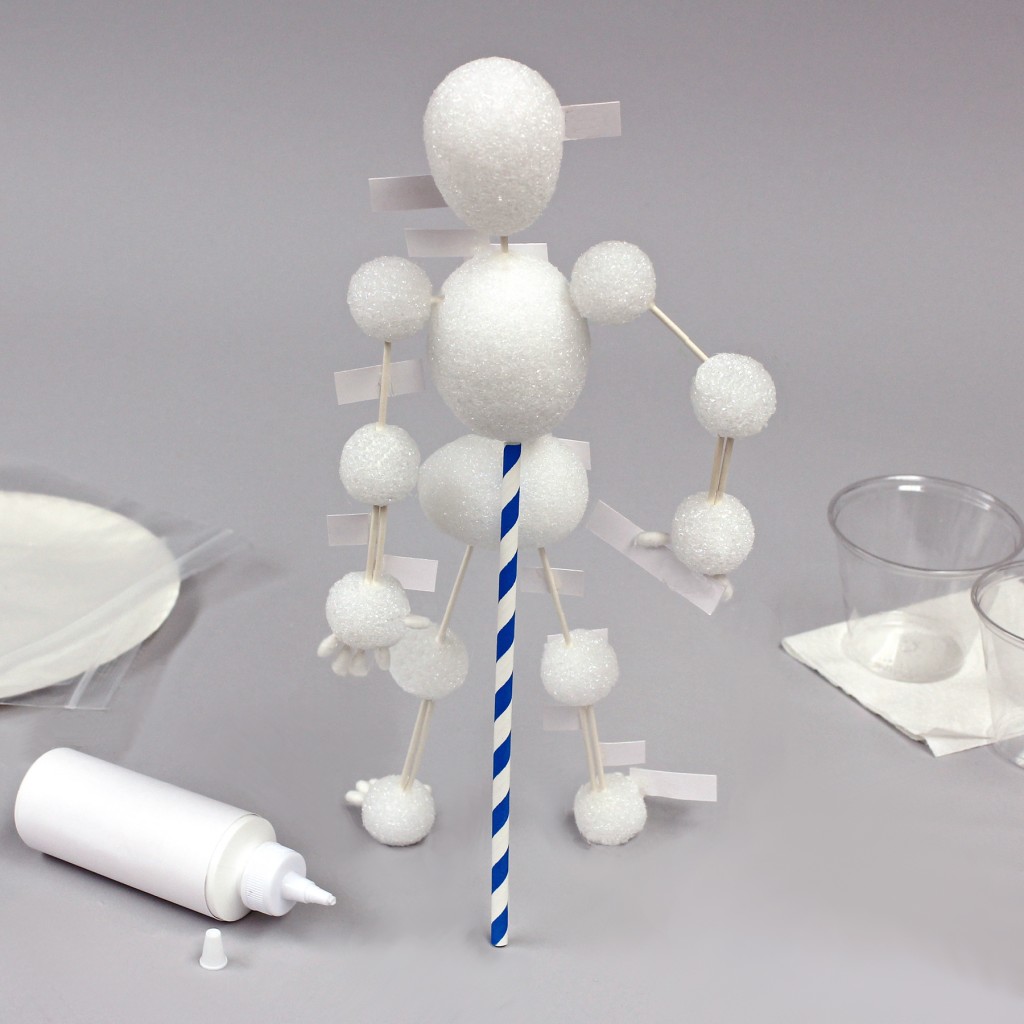
- So that the skeleton can stand, demonstrate how the straw can go in the bottom back of the large middle egg. Just make a small indention with the straw and set it back from the skeleton to support it, like an easel back on a picture frame.
Tips & Ideas:
- When cutting off the ends of the cotton swabs, work over a paper bag to catch the flying pieces. Don’t let the child cut them – especially not with scissors. It’s too easy for them to slip and be hurt.
- If the shoulder sticks poke through the foam, apply glue into the foam opening and press the foam back into place.
- If the straw isn’t long enough to go from the bottom of the back down to the table, you can attach it to the lower foam egg instead but it might be better to use a long shish-kebab skewer or thin wood dowel that can go inside the straw to extend it at the top.
- Check the nozzle of the tacky glue bottle to be sure that it’s clear. When using and storing a tacky glue bottle make sure that the cap is on and set it on its side. This keeps glue in the nozzle so that there is minimal squeezing when using.



 Subscribe


