Supplies
- FloraCraft® FloraFōM®:
- (1) 2 7/8" x 5 7/8" Cone - Green
- (1) 3 7/8" x 8 7/8" Cone - Green
- (1) 3 7/8" x 11 7/8" Cone - Green
- (1) 2 5/8" x 3 3/4" Mug Plug - Green
- 12" x 12" Decorative Paper:
- (3) "Fern Velvet Dots"
- (2) "Seersucker Stripe on Fern"
- (1) "Iridescent Green Grasscloth"
- Clay Pots - Terra Cotta:
- (1) 2 3/4"
- (1) 3 1/4"
- (1) 3 3/4"
- One Package Paper Crimps - Natural
- Wood Dowels:
- (1) 5/16" x 12"
- (1) 5/16" x 15"
- (1) 5/16" x 18" lengths
Tools
- Toothpicks
- Glue Stick
- Craft Glue
- Rotary Paper Trimmer
- Foam Cutter
- Cutting Mat
- Circle Cutter
- Paper Edger
- Scissors
- Metal Ruler
- Black Permanent, Fine-Line Marker
Instructions
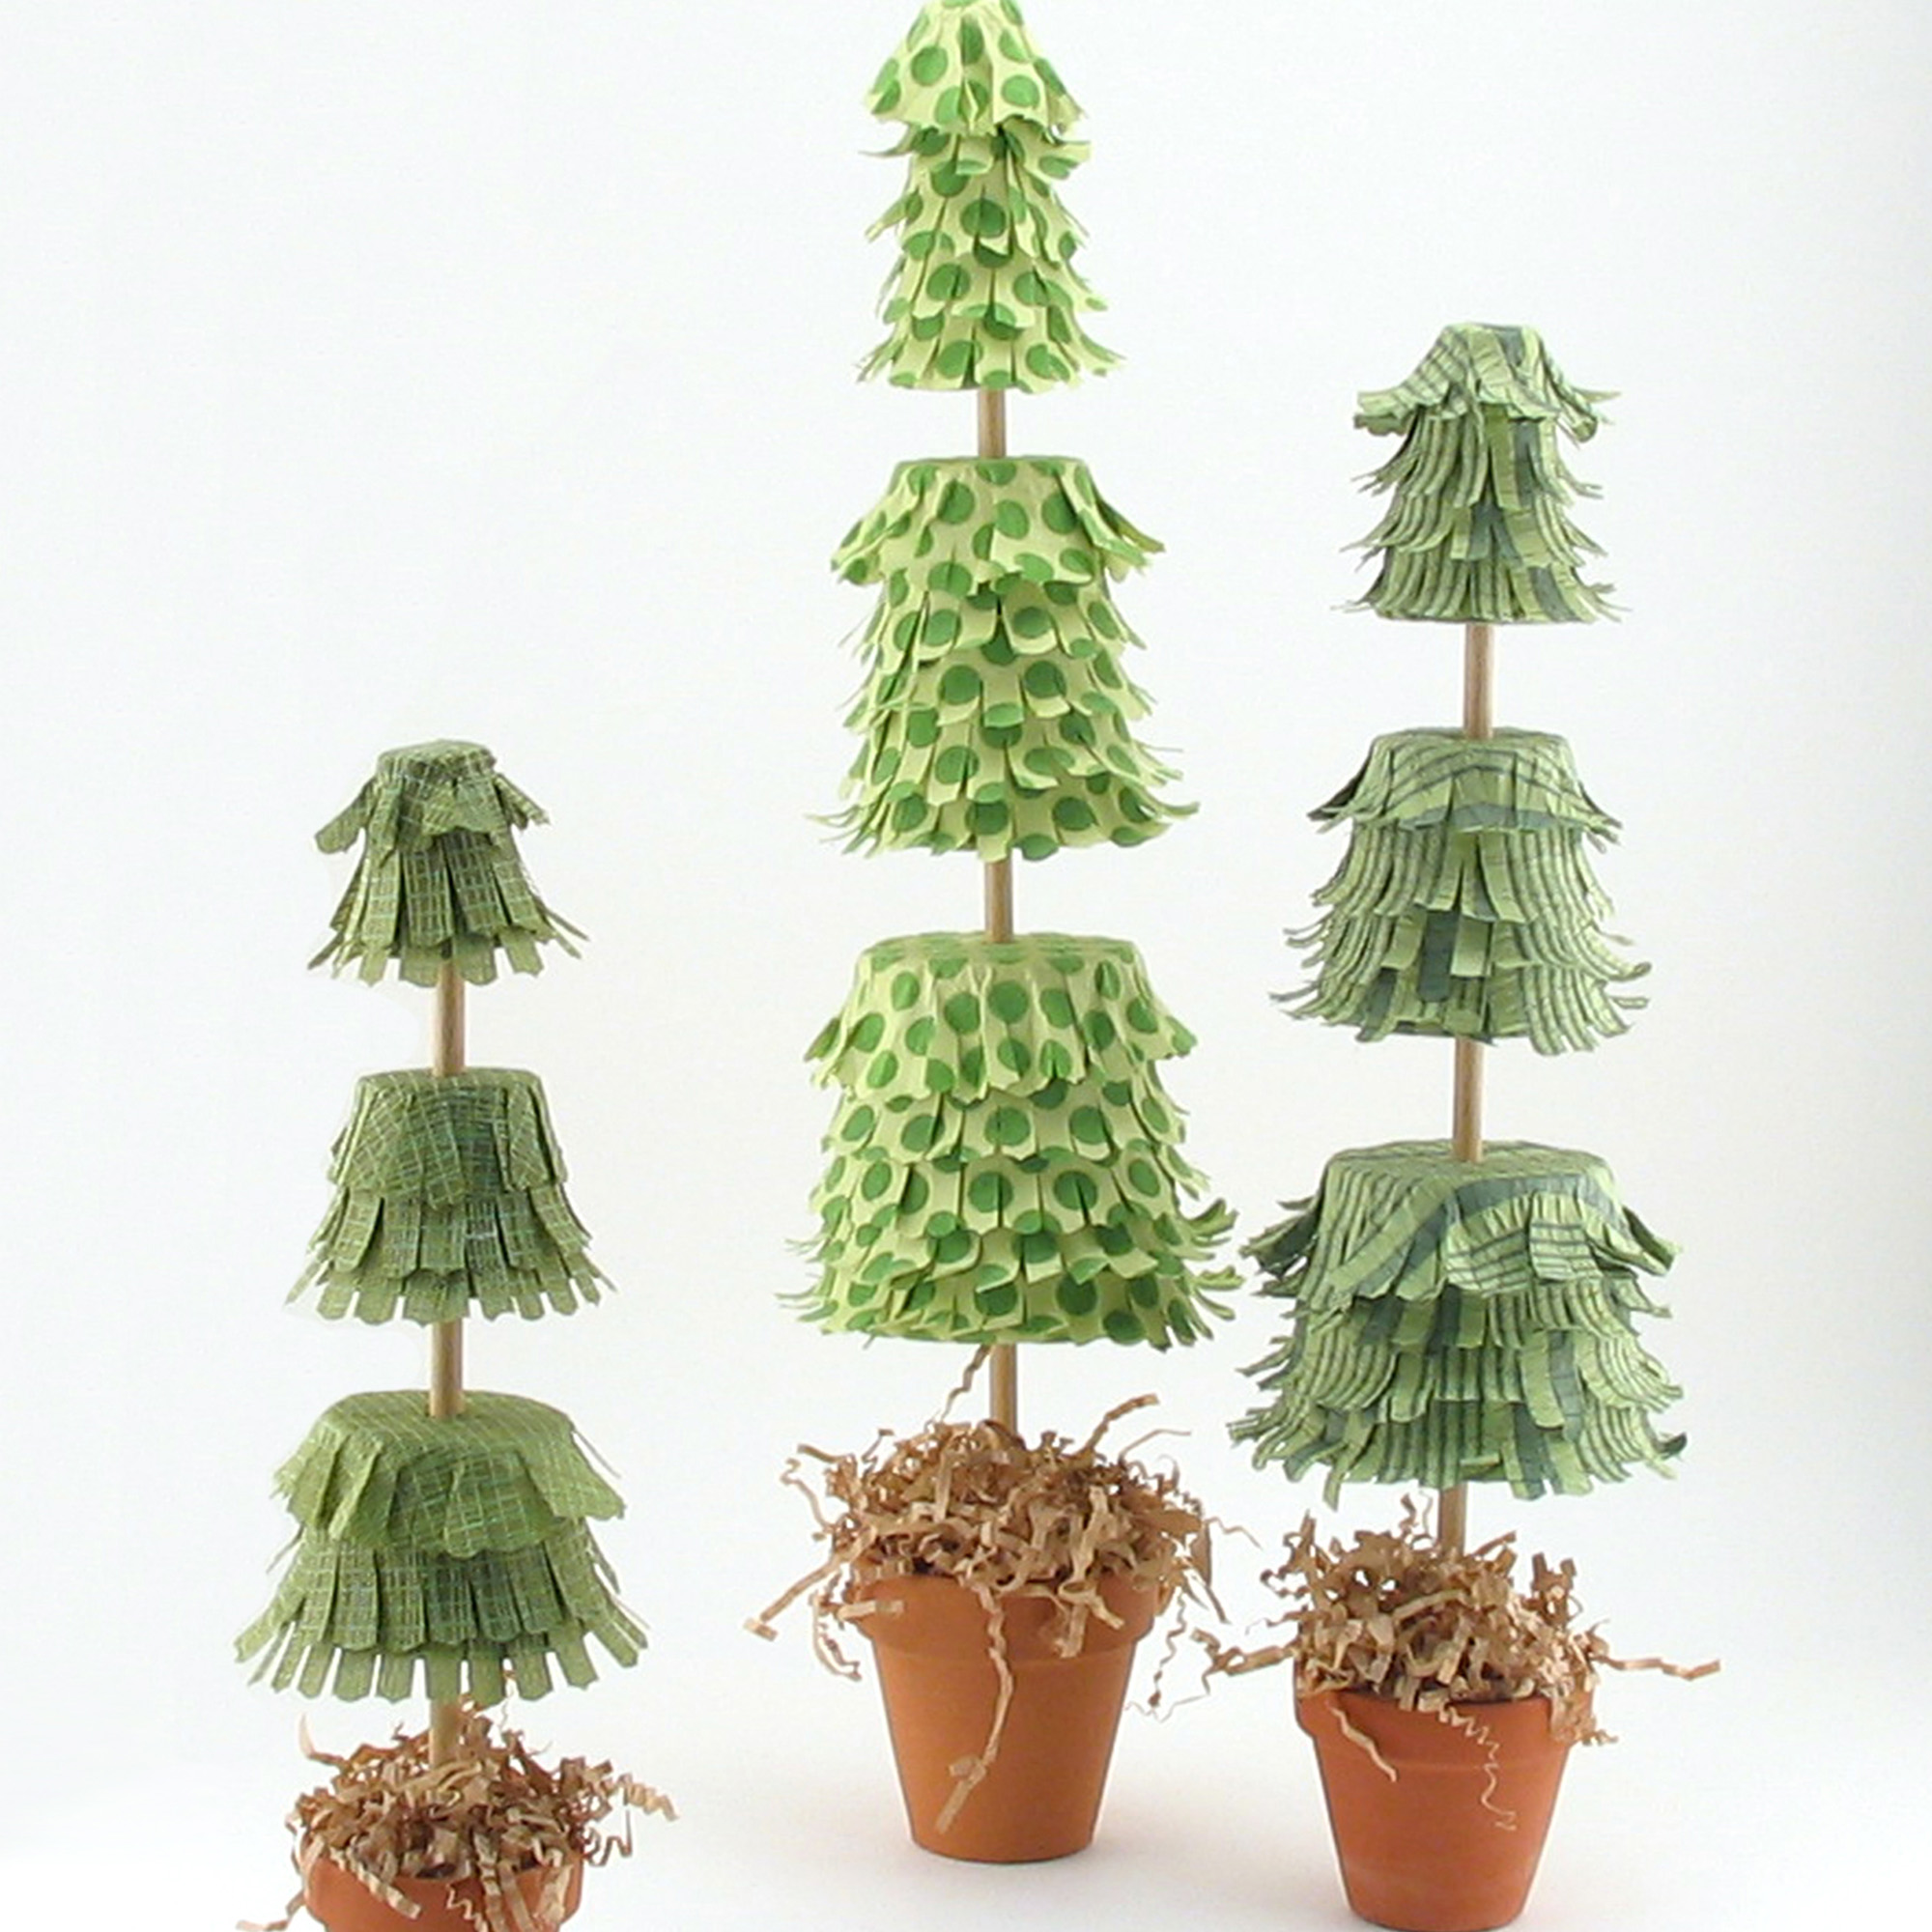
FOR MEDIUM TREE
1. Cut foam cones. Use marker and ruler to measure and mark middle-sized cone into thirds. Use foam cutter on cutting mat to cut cone.
2. Insert dowel. To make channels in cone sections, start with the bottom section. Insert 15″ long dowel into the top center, twisting down through section. (Be careful not to press foam so much that dowel becomes loose. If it does, insert toothpicks to tighten.) Remove dowel. Repeat with the middle section of a cone. Press the top section of the cone down onto the dowel without going through the top. Remove dowel.
3. Cut circles and strips. Using circle cutter and cutting mat, cut circles from “Seersucker Stripe on Fern” paper, measuring: 5″ and 5 1/2″ (for bottom section); 4″ and 4 1/2″ (for middle section); 3″ and 3 1/2″ (for top section). Use rotary paper trimmer to cut another sheet of same paper into eight 1 1/2″ wide strips. Use a paper edger to barely trim off the edge of the 5 1/2″, 4 1/2″, and 3 1/2″ circles and along one long edge of each strip. Cut 1/2″ slits approximately 1/4″ apart along the edge of each circle and along the decorative edge of each strip. Use a barrel of marker to curl up the edges of the paper.
4. Cover bottom section. Start with the bottom foam section. To cover underneath the bottom, apply glue to the bottom and lower edge of the foam. Place foam onto a 5″ circle and bring up the paper edge, pressing it into the glue, easing and slightly overlapping paper as needed. Apply glue about an inch above the bottom edge and press the straight-cut side of one strip into the glue. Glue and wrap the rest of the strip around foam, allowing the piece to extend slightly beyond the bottom. Trim the strip where ends meet. An inch above that strip, repeat with another strip, and then a third. For the top row, apply glue to the top of the foam and press a 5 1/2″ circle into it, folding it over sides to cover the edge and create the last ruffled row. Use a craft knife to make slits through paper where holes are on top and bottom. Insert 15″ dowel through paper-covered foam bottom section.
5. Cover middle and top sections. Repeat Step 4 using the middle foam section, 4″ circle on the bottom, and 4 1/2″ circle on top. In the same way, cover the top foam section using a 3″ circle on the bottom and a 3 1/2″ circle on top, but do not cut a slit on the very top.
6. Assemble tree. Cut floral foam plug into thirds. (Set aside two of them for other trees.) Use tacky glue for the following. Glue plug piece into 3 1/4″ diameter pot. Press dowel into the center and glue. Apply glue to the top of floral foam and cover with paper crimps. Carefully press the bottom middle and top sections of the tree onto the dowel, evenly spacing sections. (Insert toothpicks into holes to secure as needed.)
FOR LARGE TREE
Follow Medium Tree Steps 1 and 2, but use a large cone and 18″ dowel. For Step 3, cut circles from “Fern Velvet Dots” paper as directed but for the bottom section cut 6″ and 6 1/2″ circles instead of 5″ and 5 1/2″. Continue following remaining steps but use four strip-rows in each section due to larger size and use 3 3/4″ diameter pot.
FOR SMALL TREE
Follow Medium Tree Steps 1 and 2, but use a small cone and 12″ dowel. For Step 3, cut circles from “Iridescent Green Grasscloth” paper, measuring: 4″ and 4 1/2″ (for bottom section); 3 1/2″ and 4″ (for middle section); 2 1/2″ and 3″ (for top section). Continue following remaining steps but make only two strip-rows in each section due to smaller size and use 2 3/4″ diameter pot.





 Subscribe


