Supplies
- FloraCraft® CraftFōM®:
- Cone:
- 12" - White
- (2) 24” - White
- 5" Cube - White
- Cone:
- Assorted Silk Leaves
- Raffia
- Fall Napkins
- Fall Ribbon
Tools
- Decoupage
- Paint Brush
- Low-Temp Glue Gun
Instructions
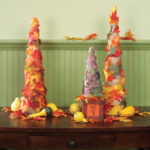
- Attach leaves to each cone, securing with low-temp glue. Overlap each leaf slightly to cover the cone completely. For tailored appearance, glue the leaf completely flat onto the cone. For more dimension and texture, glue just the centers of the leaves to the cones, leaving each leaf’s edges loose. Another variation is to wrap bundled strands of raffia spiraling up the cone, leaving about 4″ between each wrap. Now fill in between the raffia with leaves, slightly overlapping to cover the cone. Secure with low-temp glue.
- To create the cube stand, Choose a fall napkin large enough to cover one side of the 5″ cube; it can be slightly smaller as a ribbon will be used to frame the napkin. Peel away the top layer image from the napkin. You will need five 1-ply napkin images to cover the cube sides and top; the bottom can be left raw. Brush the cube with a coat of decoupage. Lay the napkin in place and apply another coat of decoupage. Let dry. Repeat to cover three other sides and top. Using a coordinating ribbon, glue a frame around each side of the cube as shown.
Tip: Gluing the leaves to the cones in different patterns will give a unique look to each cone. Try gluing them horizontally, vertically, or spiral them up the cone.
"*" indicates required fields






 Subscribe


